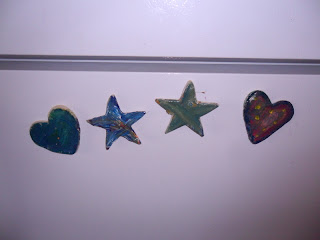
We had extra salt dough left over and was trying to think of a unique way to use it up, other than just to play with! So we made magnets.....lovely, fun, creative, inspired and simple. Have fun!
Making Magnets
You will need:
1 cup of salt
2 cups of flour
1 cup of water
extra flour for kneading and rolling out
rolling pin
acrylic paints
glitter, beads, feathers, string, etc. for decorating
extra flour for kneading and rolling out
rolling pin
acrylic paints
glitter, beads, feathers, string, etc. for decorating
Preheat your over to 250 degrees
Roll the dough out to about 1/4 inch thickness on your lightly floured surface.
Cut them out using whatever shapes you choose
Bake your shapes at 250 degrees for about 2 hours. Flip to the other side after the first hour
After your shapes have cooled, paint them and decorate them as you wish.
Once the paint has dried, apply your magnets to the back of the shape with some krazy glue
or with a hot glue gun
Lastly, you can feel free to spray the front of your magnet with a clear gloss to help preserve the color and the magnet itself. The gloss also adds a nice sheen, adding some sparkle when the light hits them just right.
Let them dry for a few minutes, then.......hang them on the refrigerator or other space that you might have which could us a fun and festive magnet. This is such a sweet way to not only hang a piece of artwork for all to see but, the magnet itself, is a personalized piece of artwork!!
Most importantly........have fun, be creative and let your children guide you! Wishing you all a lovely Wednesday!


No comments:
Post a Comment